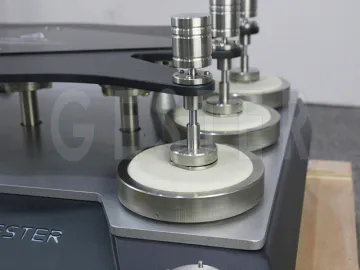
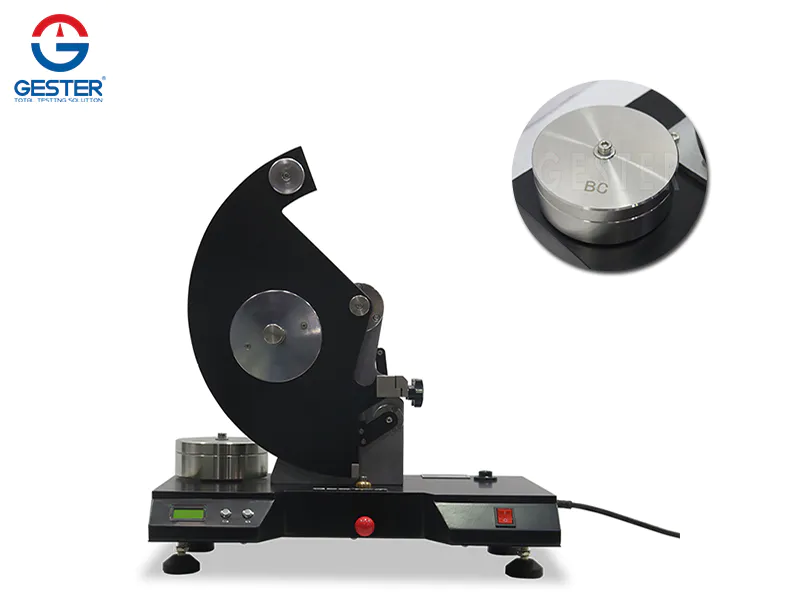
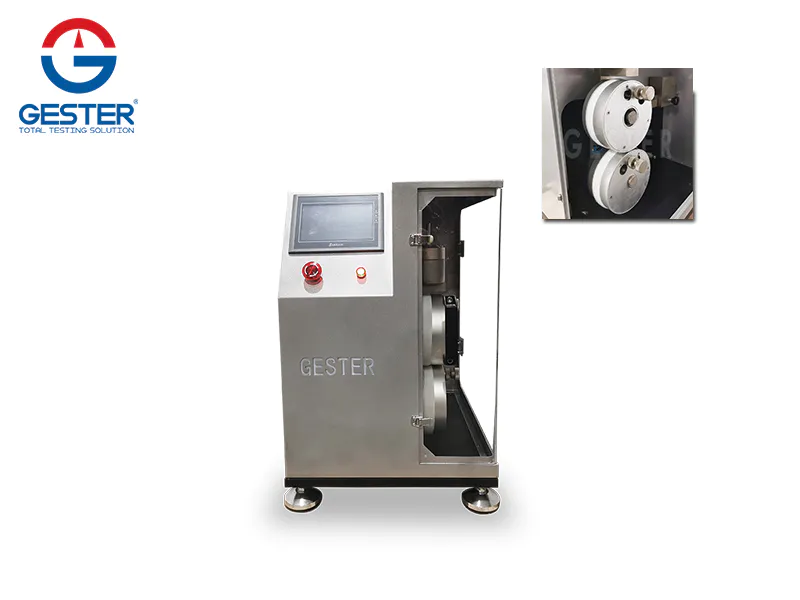
loading

22 years focused on physical lab testing machines and provide total testing solution according customer requirement.

ShIP to

Button tester parameters and installation method

by:GESTER Instruments     2022-09-09
The instrument conforms to the standards: ASTM F963-08, EN 71-1, 16CFR 1500 The use of the instrument background: Buttons and buttons are common and important accessories on clothing. If the firm strength of buttons and buttons is low, they will easily fall off during the wearing process of the clothing, which will cause unnecessary embarrassment, and seriously cause the danger of swallowing by the baby. Therefore, all buttons, buttons and fasteners on the garment must pass through Button tester detection. Application: Check the fixing strength of buttons and buttons. The composition of the button tester: it consists of a concave clawless pliers, a bottom fabric pliers and an Imada push-pull gauge. Button parts are held by concave clawless clamps and garments are held by bottom fabric clamps. By rotating the upper flywheel, the user can apply a fixed force and record the fixed or breaking force. Using clamps and accessories, the instrument can test other buttons, denim buttons, four-hole buttons and clothing accessories such as zippers, bow ties, appliqués, hooks, D-rings, etc. Hardware configuration: ① tension seat ② Imada push-pull gauge ③ concave three-jaw button pliers - common model ④ convex two-jaw button pliers - common model The installation method of the button pliers instrument: 1. The installation method of the base: The instrument can be installed on the table to make the instrument more stable. When installing, please ensure that the work surface is level, so that the test can obtain accurate values; 2. Installation method of the push-pull dynamometer: A. Use an M4 wrench to loosen the four M4x15 hexagon socket head cap screws on the dynamometer mounting plate, and remove dynamometer mounting plate; B. To install a digital push-pull force meter, use an M4 Allen wrench to remove the 4 pieces of M4 in the accessory bag×10's socket head cap screws through 90's on the dynamometer mounting plate×40 holes into the 4 M4 threaded holes of the dynamometer to install the dynamometer on the dynamometer mounting plate; or use a Phillips screwdriver to screw the 4 M3 M3×10 Phillips pan head screws through the inside of the dynamometer to mount the dynamometer to the dynamometer mounting plate. Mounting plate 145×Screw the 30 hole into the 4 M3 threaded holes of the dynamometer; C. To install the pointer push-pull gauge, use a Phillips screwdriver to screw the 4 M3 on the back cover of the push-pull gauge.×Remove the 10 screws and put the 4 M3 pieces in the accessory bag×14 Phillips screws through 145 on the dynamometer mounting plate×30 mounting holes, screw into the 4 M3 threaded holes on the back cover of the dynamometer (remove the M3×10 screw holes); D. After installing the push-pull dynamometer, use the M4 Allen wrench to re-install the dynamometer mounting plate on the rack. 3. Installation method of the upper fixture: Install the upper fixture with an internal thread connecting hook on the test rod of the push-pull gauge. 4. Installation method of the base fixture: Use the two M6 screws and M6 Allen wrench in the accessories to connect the base fixture and the machine base firmly. More about button tester: http://www.lalianniukou.com/
It isn't just about being on textile testing equipment anymore–it's about maximizing the potential of the platform of manufacturing.
Super quality are in offer at GESTER Instruments, welcome to visit us.
By balancing the efficiencies of new technologies with the personal touch of highly trained and motivated professionals, GESTER International Co.,Limited is able to deliver solutions and services that exceed our customers’ expectations. We thereby earn their loyalty.
Custom message
Chat Online 编辑模式下无法使用
Leave Your Message inputting...